What to Expect on Demo Day: A Pro's Guide
“Demo day” might sound like the fun part of remodeling—kick the door in, smash some drywall, maybe swing a sledgehammer or two. But for us at HUGE Handyman, demo day is not demolition… it’s preparation.
Done wrong, demo creates delays, damages things you want to keep, and fills your house with dust. Done right, it sets the stage for a smooth remodel with no surprises, no mess, and no rework.
Here’s what we do differently—and what you can expect when it’s time to tear things out.
🔒 Step 1: Containment, Dust Control & Asset Protection
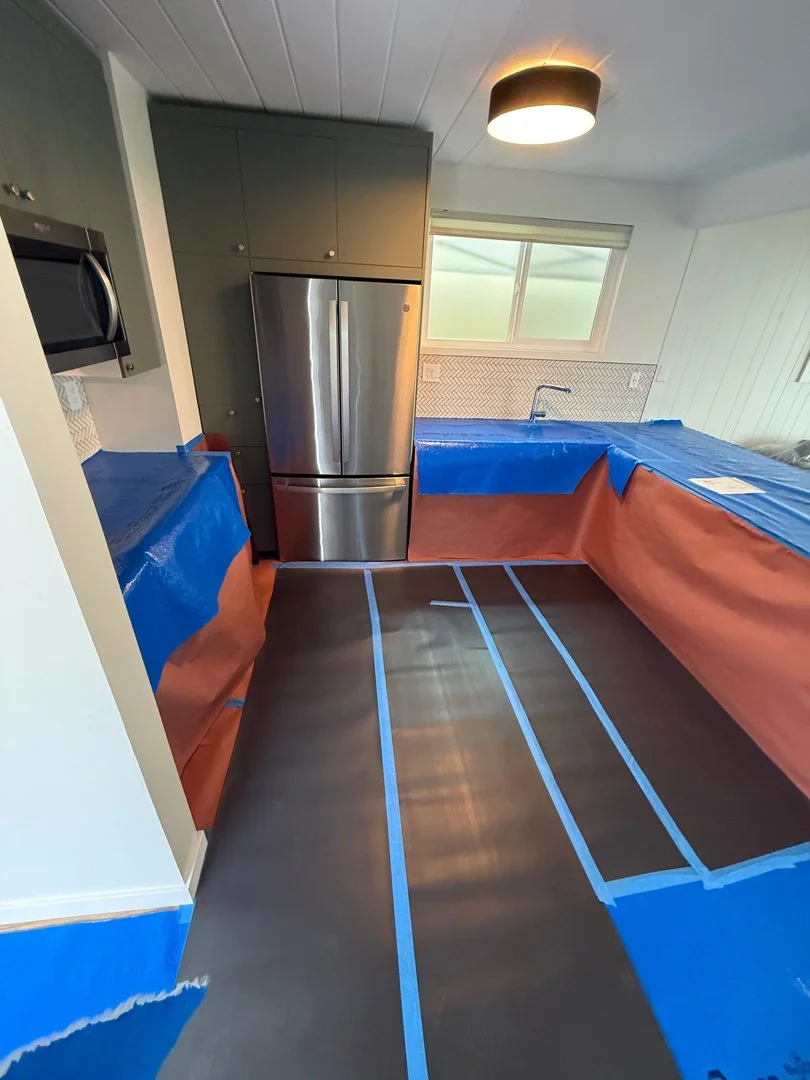
We start by locking down the work area like a quarantine zone.
That means:
Ram Board, hardboard, or poly sheets on all floors
Blue tape & plastic walls (with zippers) to seal off rooms
Covering vents to protect your HVAC system
Wrapping nearby surfaces (cabinets, counters, fixtures) to avoid damage
Dust travels. We stop it before it starts.

🪚 Step 2: Strategic, Layered Removal
This isn’t HGTV-style destruction. We remove carefully in layers:
Soft demo (baseboards, trim, fixtures, wall coverings)
Drywall, tile, or cabinetry depending on the scope
Framing or subflooring, if needed
We also inspect as we go—checking for moisture damage, bad framing, or non-code wiring before moving forward.
If we see something wrong, we don’t hide it. We fix it.
🚛 Step 3: Haul-Away & Jobsite Reset
After demo, we clean up—completely:
Bag up and haul away all debris
Vacuum or sweep the workspace
Double-check that no utilities were affected
Get the site ready for building, not just standing around
Sometimes we even start layout marking on demo day if the conditions are right. It’s all about keeping things efficient.

🧠 Final Thought: It’s Not TV, It’s a System
At HUGE Handyman, demo isn’t chaos—it’s calculated. We treat it like the foundation of everything that comes after. Because when you prep right, you build right.